Thursday, August 1, 2013

Sentencing GuideLIMEs TRUFFLES

First off, thank you Samantha (best sister in the world) for staying up and making these with me. Now on to the post...

It's August 1st. It's my last week working at the US Attorney's Office. It's almost the end of summer. It's not okay.

I tend to keep my posts strictly food-informative, but this summer has been an experience. Guess I’m a little emotional right now, so you get a more personal post this time.


I can’t believe how quickly this summer has flown by. Of course there are pluses and minuses to a rapidly departed summer experience. As anyone that has even been within five feet of me knows, I LOVE LOS ANGELES. What’s not to love? The city is constantly taking my breath away. But sometimes, I just can’t breathe here, too. There is something to be said about the slow, quite pace of Williamsburg. Surprisingly, sometimes (like now) I find myself missing my life there (maybe it’s just the independence factor – sorry Momma, I love you dearly, but I don’t always need the 11pm phone call when I’m out with friends asking if I’m coming home yet. I’m trying to look cool and you’re killing my vibe!).

Oh Williamsburg. Last year was nothing like my first (NOTHING), and I know this year will be very different than last. I wish I could go back to last year – it was perfect. At the same time, however, I’m (kind of) sure my third and final year in Williamsburg will be perfect in its own right. I expect it to be a year I learn a lot, not just school-wise. Life is scary, and once May hits I won’t be able to avoid it anymore. Grr.

At least I’ll always have baking/cooking to keep me calm. Here’s a recipe that tastes like summer. Delicate little bites of lime, with a sweet coating of smooth chocolate. A beautiful balance of sweet and sour, bite-sized (and no bake!). The perfect summer treat!


What you’ll need:

-          1 package of cream cheese
-          4-5 limes, zested and juiced
-          1 package vanilla crème sandwich cookies – think white oreos (I did half-n-half with    
            lemon sandwich cookies)
-          1 bag of chocolate chips (white or chocolate)

 
How you make it:

Umm…EASIEST THING EVER!

In a food processor, crush all of the cookies until they resemble graham cracker crumbs. Then add in the lime juice, lime zest, and cream cheese. Pulse until the mixture is moist throughout. You can also crush the cookies by hand and then mix all of the ingredients together in a stand mixer. Place the “dough” in the freezer for 30 minutes.

After the dough has stiffened, form balls and place on a cookie sheet. Once you’ve worked through all of the dough, place the balls back in the freezer for 15 minutes. Melt the chocolate chips in the microwave (or on a double boiler). For the microwave, use 15 second intervals, stirring in between, until you reach the desired consistency. Then dip the balls, place on a lined cookie sheet, top with some extra lime zest, and place back in the fridge or freezer to harden. Then you’re done!! Enjoyyyyyyy your little summer bites!


LINKS! What are Sentencing Guidelines ?
 

Wednesday, July 3, 2013

Cookies and CRIME Chewy No-Bake Cookies

I usually hate autocorrect. We've all read the ridiculous, often embarrassing corrections it can make. While not nearly as good as the ones on damnyouautocorrect.com, one time I sent a boy "Poop time?" instead of "Pool* time?" Thank you, autocorrect for that absolutely mortifying change-up.  Never lived that one down.

Sometimes, however, autocorrect can be a magical thing. Point in case -- Cookies and Crime/ Creme*. I didn't think I had a pun for this recipe, and I was very sad you would all be missing out on a great one. Lucky for you, my iPhone solved yet another life problem. Impressive.

Imagine rice crispy treats with crushed oreos instead of rice crispies. Yah, I know. Mind blown.


What you'll need:
- 1 bag of regular marshmallows
- 1 package of oreo cookies
- 4 tbsp butter

How you make it:

Line an 8x8in baking pan with plastic wrap. Crush the oreos, but leave them a bit chunky. You can either use a food processor or put all of the oreos in a ziplock bag and smash them. Then, in a large (and I mean LARGE -- marshmallows expand), microwave the marshmallows and butter for 1.5-2 minutes until really puffy.

Next, add in the oreo and mix. Once the mixture has cooled a bit, you can pour it into the lined pan and refrigerate for at least 30 minutes. Cut and serve with a big glass of cold milk!


Thursday, June 20, 2013

STUDYING FOR THE Chocolate & RhuBARb Muffins (Vegan & Gluten Free)

My poor poor friends are slaving away studying for the Bar. They're spending hours on end studying and the gym has become a stranger to them. With no free time, early morning lectures, and untouched gym clothes, I've decided to help my buddies out. Here's a healthy, easy, on the go snack that is packed full of good stuff and actually good flavors! Friends, don't let the Bar break your spirits and your bodies!

BUT I'm not going to lie -- I was very skeptical of this recipe. It sounded TOO healthy, even for me. No eggs, no butter, no sugar, chia seeds and almond flour?! WHAT?! No way can this taste good...right? WRONG! These little muffin treats are surprisingly yummy. The tartness of the rhubarb with the sweetness of the chocolate and dried cranberries, along with the crunch of oatmeal makes for an awesome little morning snack or afternoon treat (whether you're studying for the bar or just living life on the go).


What you'll need:


- 1 1/2 cups almond flour
- 1/2 cup rolled oats
- 1 1/2 tsp baking powder
- 1/2 tsp baking soda
- pinch of salt
- 3 tbsp chia seeds & 1/4 cup water
- 1/4 cup honey
- 2 tbsp extra virgin olive oil
- 1/2 cup orange juice
- 1 tsp vanilla extract

- 1 1/4 cup finely chopped fresh rhubarb
- 1/2 cup semi-sweet chocolate chips

- 1/3 cup chopped dried cranberries
- extra oats and mini chocolate chips for topping


How you make it:


First start by preheating your oven to 350 degrees and line your muffin tin with cupcake wrappers. Then combine the chia seeds and water in a glass and set aside for 10- 15 minutes (until they absorb all of the water and turn into a gel-like substance). While the chia seeds absorb all the water, In a mix the flour, oats, baking powder, baking soda, and salt together until combined. Then, in a separate bowl, add the chia seed gel, olive oil, honey, orange juice, and vanilla extract. Whisk gently until smooth. Add the wet mixture to the dry flour mixture and blend until just moist. Stir in the rhubarb, chocolate, and cranberries.


Carefully spoon the batter into the lined cupcake tin. Sprinkle the extra toppings and bake for 25- 30 minutes. Let muffins cool before removing them from the pan, and then enjoy!


Saturday, June 15, 2013

ImPEACH&MINT Summer Salad


HELLLOOOOO SUMMER! Well...almost summer. Friday is officially the first day of summer. Oh, what a magical day!

I am back in California and the sun is shining (for the most part)! One of my favorite perks of living in California? DELICIOUS PRODUCE. One of my favorite? PEACHES!

Lucky me, summer means lots and lots and lots of PEACHES! Beautiful, ripe, juicy peaches that are bursting with flavor. I have only ever eaten peaches as a snack or dessert, and never as a side dish to a savory meal. Things are changing! For your next summer bbq, light dinner, or healthy lunch, try out this salad. It's fresh, simple, and surprisingly delicious. I paired this summer salad with a mint-spiced lamb burger and a refreshingly cool garlic, cucumber, and yogurt salad. YUMMM

Since it's not a baked dessert, you know my motto: all the ingredients are to taste, no exact measurements.


What you'll need:
- 3 ripe peaches
- handful of fresh mint
- 1 small container of fresh baby mozzarella
- olive oil
- salt & pepper
- 2 medium ripe tomatoes, heirloom if possible


How you make it:

Start by slicing the peaches and tomatoes into approximately equally thick slices. Cut the mozzarella into small chunks, and roughly chop the mint. Then toss everything together with the olive oil, salt and pepper. And you're done! Enjoy :)


Links: Impeachment


Saturday, May 11, 2013

Reese's & Banana GRADUATION CAPcakes


IT'S GRADUATION WEEKEND!!! A big congratulations to my 3L friends -- YOU DID IT! I'm so proud of you guys. Make sure you don't forget me when you're all hotshot lawyers :) In honor of your big day, I made treats (shocker, right??). Now go out there and do great things (while munching on one of these sweet treats)!
CONGRATULATIONS!


What you'll need for...

the Cupcakes: 
- 1/2 cup sugar
- 1/4 cup vegetable oil
- 1/4 cup peanut butter
- 1 1/2 overripe bananas
- 1 egg
- 1/4 cup milk
- 1/2 tsp baking soda
- 1 cup flour
- 12 Reese's Peanut Butter Cups


the Chocolate Peanut Butter Frosting:


- 1/4 cup butter, room temperature
- 1/4 cup creamy peanut butter
- 2 cup powdered sugar
- 1/2 tsp vanilla
- 1-2 tbsp milk 

- 1/4 cup cocoa powder

Graduation Cap Toppers:
- 12 mini Reese's Peanut Butter Cups
- 12 squares of chocolate [about two bars]


How you make...

the Cupcakes:

Start by preheating the over to 350 degrees. Then beat together the peanut butter, bananas, and the sugar until creamy. Mix in the vegetable oil, eggs, buttermilk, and baking soda. Next, gradually mix in the flour until batter is formed. Line a muffin tin and place an unwrapped Reese's Cup in the bottom of each cup and pour batter over each Reese's Cup. Bake the cupcakes for 20-23 minutes or until a toothpick comes out clean. Let cupcakes cool on a wire rack.


the Frosting:

Meanwhile, use a stand mixer and whisk together the peanut butter and the butter. Gradually add in the powdered sugar, one cup at a time, and the cocoa. Add the vanilla and the milk in between the powdered sugar to help keep the consistency smooth (only adding as much milk as needed for desired consistency, make sure that you don't add it all at once). Then frost the cupcakes!

the Toppers:

Open and remove all packaging. Cut the bars of chocolate into square pieces. Use a lighter to melt the center of the square just a little and quickly affix the reese's cup to the square. Repeat until all of the caps are made! Refrigerate to allow them to harden. Then place them on the top of cupcake and VIOLA! HAPPY GRADUATION!!!

Monday, April 29, 2013

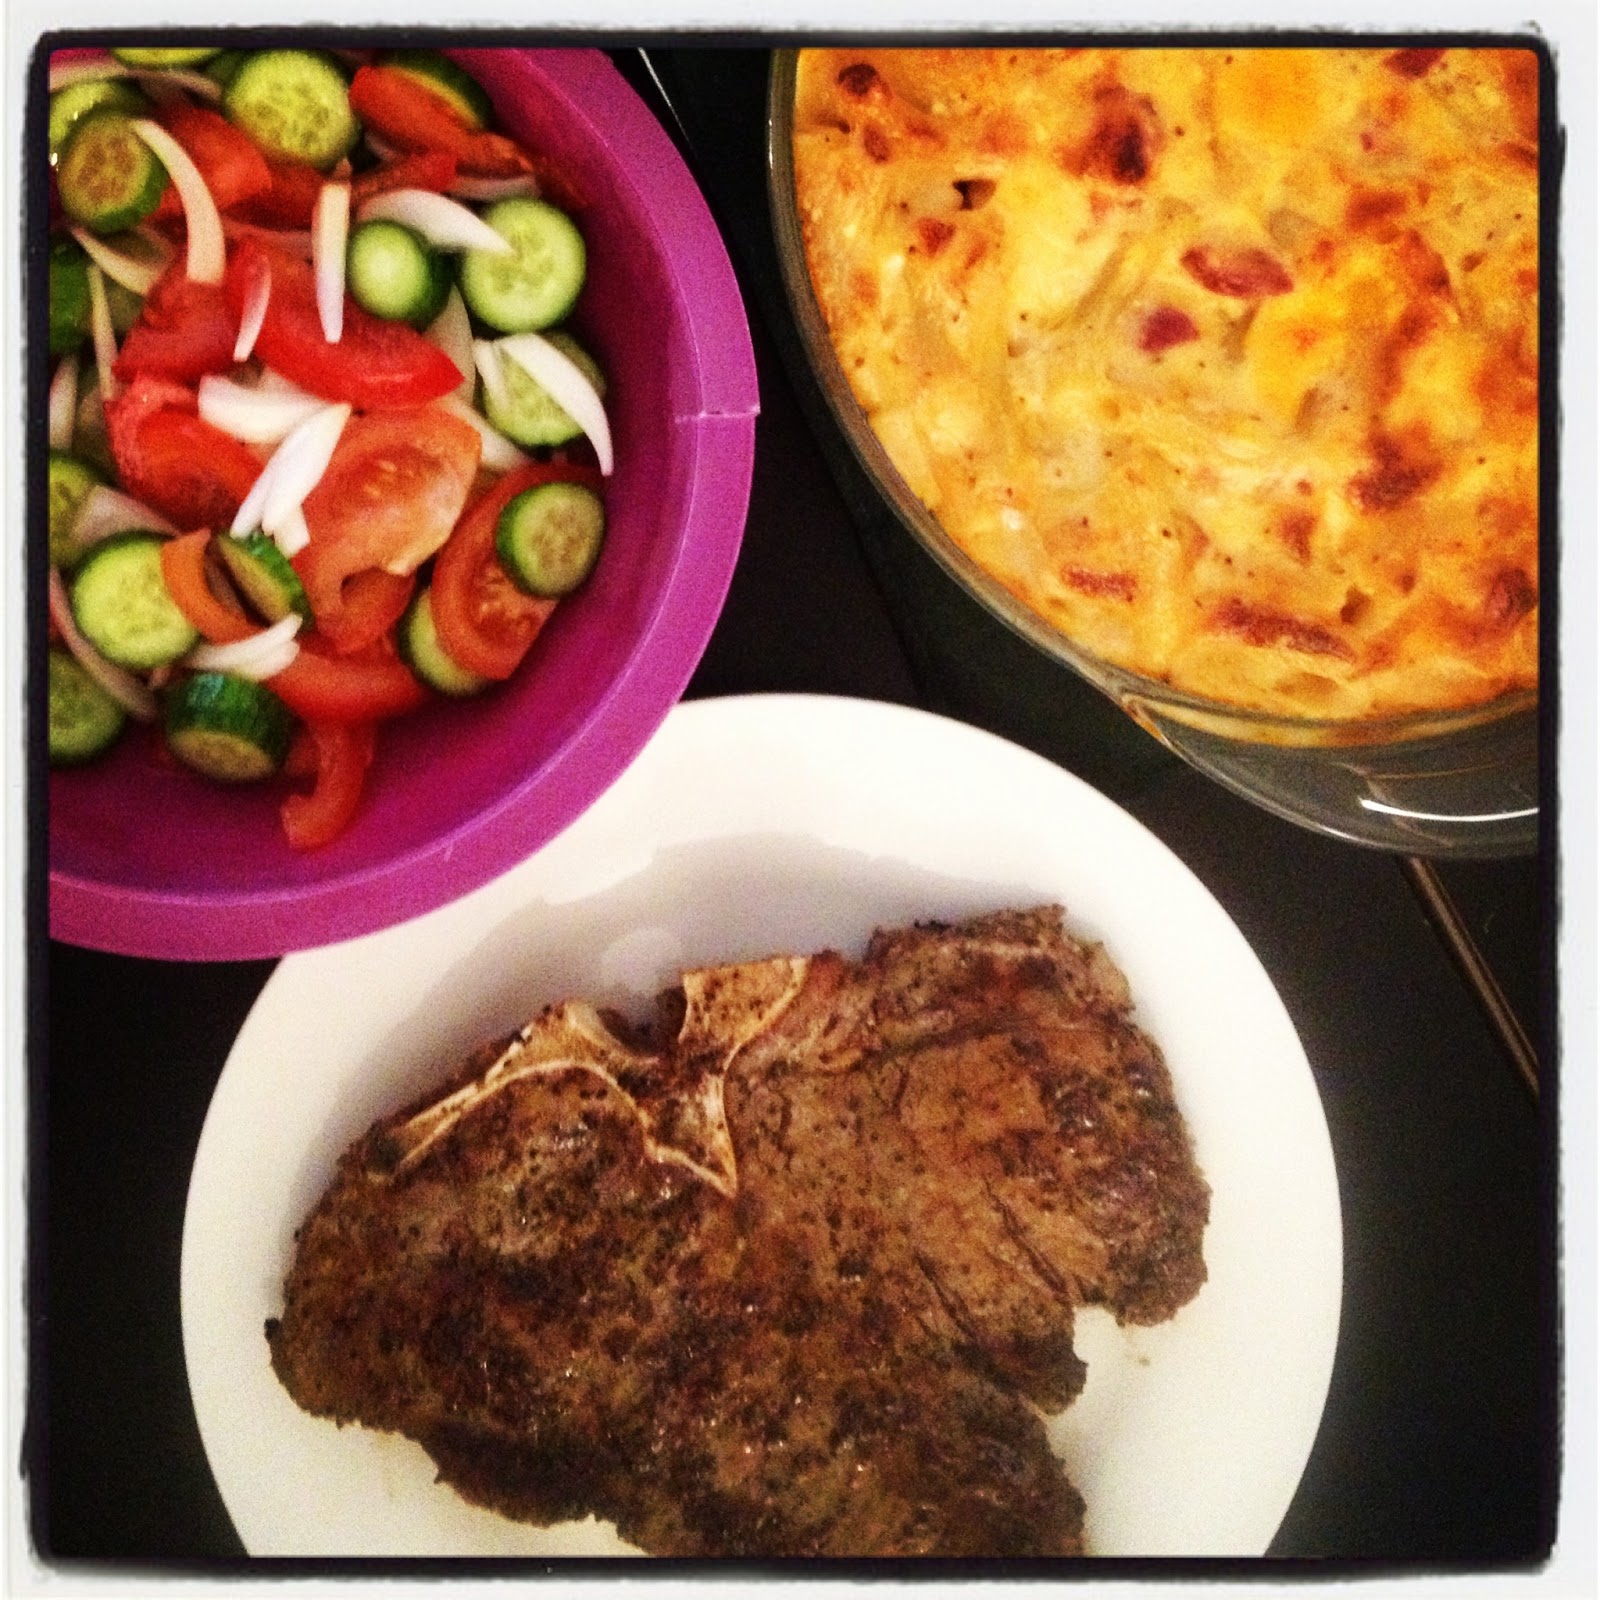
Spicy Garlic & Pancetta Mac 'n' TENANT-cheese AT WILL & Montreal Steak

Okay, okay. I hope you are as excited for this as I am. It's DELICIOUS! Every single part of it. EVERY. SINGLE. PART. But there are two things you need to know first: 1. If you have never tasted montreal steak seasoning before, then get ready to have your mind blown. and 2. Seriously, prepare yourself -- your mind WILL BE BLOWN! Oh...and the Mac 'n' Cheese is pretty darn awesome too.


There is nothing worse than mac 'n' cheese with too much pasta, too little cheese, or lack of any flavor. You don't have to worry about that here though. This might be the best mac 'n' cheese that I have ever had...I might have to sneak in to the kitchen after this post and have a second helping (oh yes, it is definitely happening). The mac 'n' cheese has the PERFECT ratio of pasta, to pancetta, to cheese. It's ooey gooey and absolutely delicious (and left overs the next day are just as good). YUM!

Please enjoy :)


What you'll need for...

the Mac 'n' Cheese:
- 1/2 box of ziti pasta
- 2 cups milk
- 1/4 cup flour
- 1/3 lb pancetta, thick cut
- 1/2 stick of butter
- 12 oz of cheese (I used equal parts Pepper Jack, Swiss, and Sharp Cheddar)
- 1 tsp red pepper flakes (or more depending on taste)
- 1 tsp black pepper
- 1/2 tsp salt
- 3-4 garlic cloves, crushed

the Steaks:
- 1 inch Steaks
- McCormick Montreal Seasoning (possibly the best thing on earth)
- olive oil


How you make it...

the Mac 'n' Cheese:

  I made a special trip to the market and got the pancetta sliced very thick. The lady at the counter said it was size 8. Two slices equaled about a 1/3 of a lb and it was the perfect amount once chopped up. Nothing beats getting a surprise piece of yummy pancetta in each bite of pasta! Mmmmm.... I'm drooling just thinking about it again.  

    Preheat the oven to 375 degrees. Cook the pasta, but under cook it just a little (it will finish cooking in the oven later), drain, and set aside.

    Next dice the pancetta. In a small pot, fry up the pancetta pieces until nice and crispy but not over cooked! Remove the pancetta, and in the same pot, melt the butter. Once melted, add in the flour and whisk until all of the lumps are gone. After a minute or two, add in the milk. Make sure to continue whisking the mixture so that it doesn't burn on the bottom. I'm Jewish. After 3-4 minutes, the mixture will thicken. Continue whisking and add in the crushed garlic, pepper, pepper flakes, salt, and cheese (minus a handful). Cook on medium heat until completely melted.

   Place the pasta back into the large pot and pour in the cheese mixture, pancetta pieces, and extra chunks of cheese. Mix well and then pour it into a 9'' pie dish. Bake for 45 minutes. Let it rest before eating so that all of the cheese becomes yummy and gooey! Then NOM away!!! (OMG IT'S SO GOOD!!)

the Steak:

   It's so simple! Preheat the oven to 375 degrees. Coat both sides of the steaks with montreal seasoning. Don't be scared to use a lot of seasoning! Next, in an iron skillet heat some olive oil (be liberal with it). When the skillet is nice and hot, place the steaks in and hear the sizzle. After a minute, flip and admire the beauty. After another minute, place the entire skillet in the oven and let it finish cooking for about 10 minutes. Take it out of the oven, let it rest before cutting for 5 mins, and then enjoy with delicious A1 steak sauce. DIG IN!

Legal Pun Links: Tenancy at Will

Monday, April 22, 2013

TRIAL Mix Cookies


Happy finals season! It's that time of year again (you know, the part that actually matters). Time to put pen to paper (or in our generation's case, fingers to computer keys) and spill out everything we know. This urge to throw anything and everything at our exam page got me thinking....TRAIL MIX -- a mix of odds and ends that somehow come together to make the most delicious of snacks. But let's be honest, trail mix is way too healthy to be my snack of choice during finals. That's what I came up with the TRAIL Mix Cookie! Unhealthy, delicious, and an awesome legal pun -- aka, perfection! Bake away my fellow procrastinators, BAKE AWAYYYYY!!!


What you'll need:
- 1 1/5 cups oats
- 1 cup flour
- 1/2 tsp baking soda
- 1/2 cup butter, room temperature
- 1 egg
- 1 tsp pure vanilla extract
- 1/2 cup white sugar
- 1/2 cup brown sugar
- 1 1/2 cups trail mix*

*the trail mix can be whatever you want it to be! I used dark chocolate M&Ms, chopped dried apricots, dried unsweetened coconut flakes and chopped almonds.


How you make it:

Start by preheating your oven to 350 degrees. Next, in a stand mixer, cream the butter, white sugar, and brown sugar together. When this is all well mixed, add in the egg and vanilla extract. continue mixing until fluffy. Then slowly add in the rest of the ingredients and continue to mix until it is all incorporated.

The mixture will be sticky so either risk getting your fingers a little sticky, or use a spoon to form 1inch dough balls. Place them on a baking sheet and bake these bad boys in for 9-10 minutes. Let the cookies cool completely before trying to take them off of the cookie sheet. And enjoy :)